Why Your Makeup Looks Different Under Flash: The Real Reason
You’ve nailed your contour, set your powder, and checked the mirror. But the photo comes back looking flat, chalky, or strangely orange. This disconnect is confusing.
You want to know why makeup looks different under flash because it ruins confidence in your look.
The culprit isn’t bad application. It’s physics. Flash emits a brief, intense burst of light that behaves differently than ambient room lighting.
As of 2026, understanding this spectral shift helps you predict camera results before you click shutter. Let’s break down the optics so you can master the lens.
Quick Answer
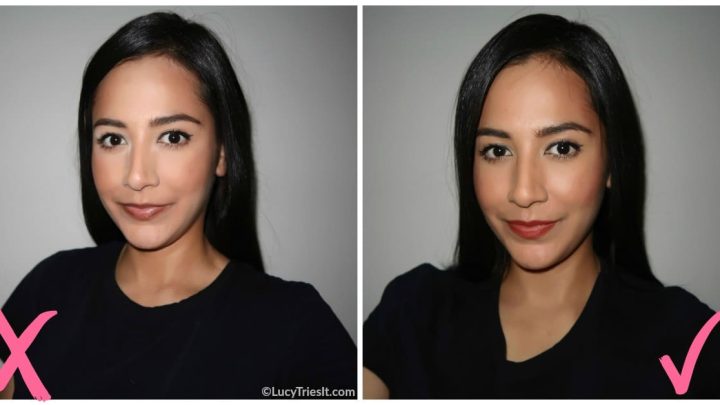
Why makeup looks different under flash? The harsh, direct light eliminates natural shadows. This flattens facial contours and highlights texture.
Physical sunscreens often reflect UV-rich flash as white cast. Additionally, cool color temperatures alter pigment perception. Your skin appears paler or grayer than in warm ambient light.
The Physics of the Flash: Why Your Mirror Lie Isn’t Real
Your bathroom mirror lies to you. Most vanity lights use warm bulbs around 2700K to 3000K. These soft sources diffuse light evenly across your face.
They mimic golden hour sunlight, making skin look radiant and smooth.
Flash photography does the opposite. It produces a sudden spike of daylight-balanced light, typically 5500K to 6000K. This high-intensity burst hits your face from a single point source.
The result is extreme contrast. Shadows vanish instantly. Without those subtle gradients, your features lose definition.
Think of it like removing the shading from a drawing. Everything becomes two-dimensional. Your cheekbones disappear.
Your nose bridge flattens. The makeup didn’t change. The lighting did.
This abrupt shift confuses the brain. We expect depth. Flash denies us that expectation.
Understanding Specular vs. Diffuse Reflection
Light interacts with surfaces in two main ways. Diffuse reflection scatters light softly. Matte foundations rely on this.
They absorb and spread light evenly. This creates a velvety finish in normal conditions.
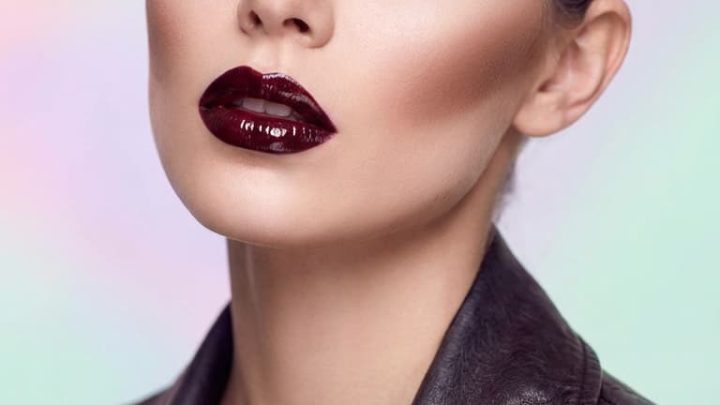
Specular reflection acts like a mirror. Shiny surfaces bounce light directly back to the source. Lip gloss, highlighters, and oily skin trigger this effect.
Under soft ambient light, specular reflections are gentle. Under flash, they become blinding hotspots.
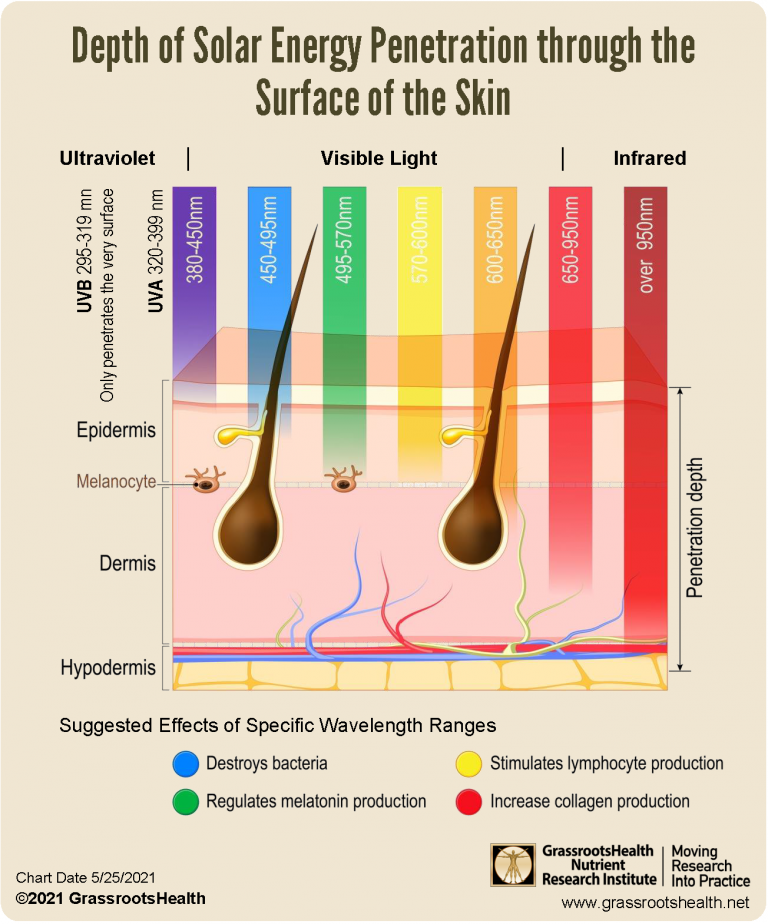
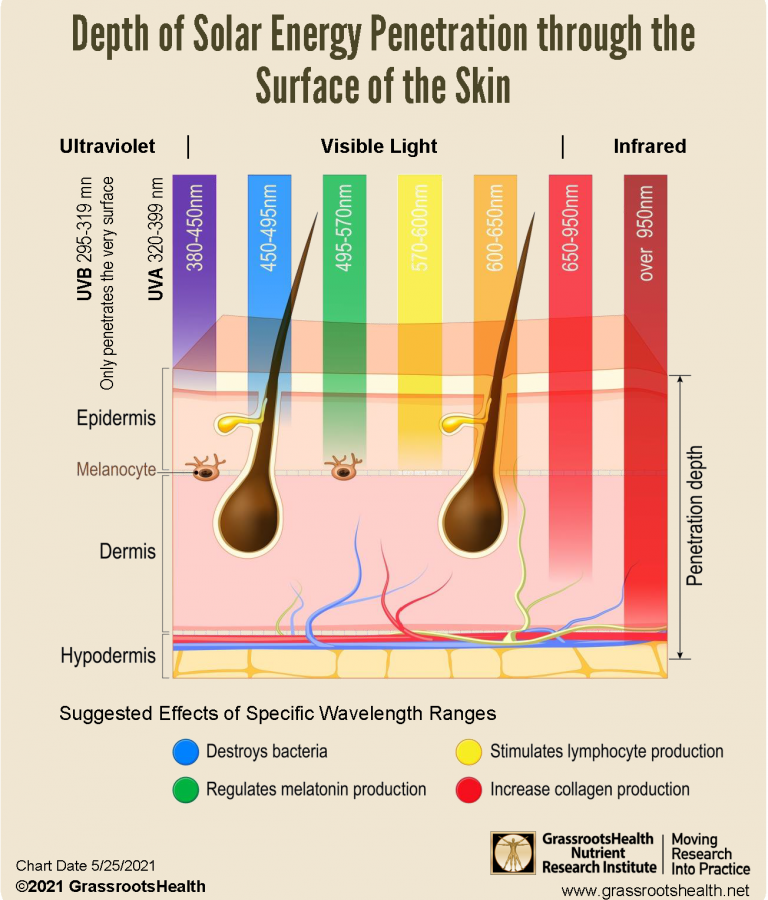
This diagram illustrates how light penetrates and reflects off skin layers. Notice the difference between scattered rays and direct bounces. Flash amplifies the direct bounces.
Your T-zone shines aggressively. Dry patches catch the light oddly. The camera sensor struggles to balance these extremes.
It clips the highlights. Details in shiny areas turn pure white. This is why dewy finishes often look greasy in photos.
The Kelvin Clash: Warm Ambient Light vs. Cool Daylight Balance
Color temperature dictates how pigments appear. Our eyes adapt to ambient warmth. A foundation matched in yellow-toned indoor light might contain blue undertones.
Those blues stay hidden until exposed to neutral or cool light.
Flash provides near-neutral daylight spectrum. It strips away the warm filter. Suddenly, gray or purple undertones emerge.
Your complexion may look sallow or bruised. This is common with mineral-based cosmetics containing iron oxides.
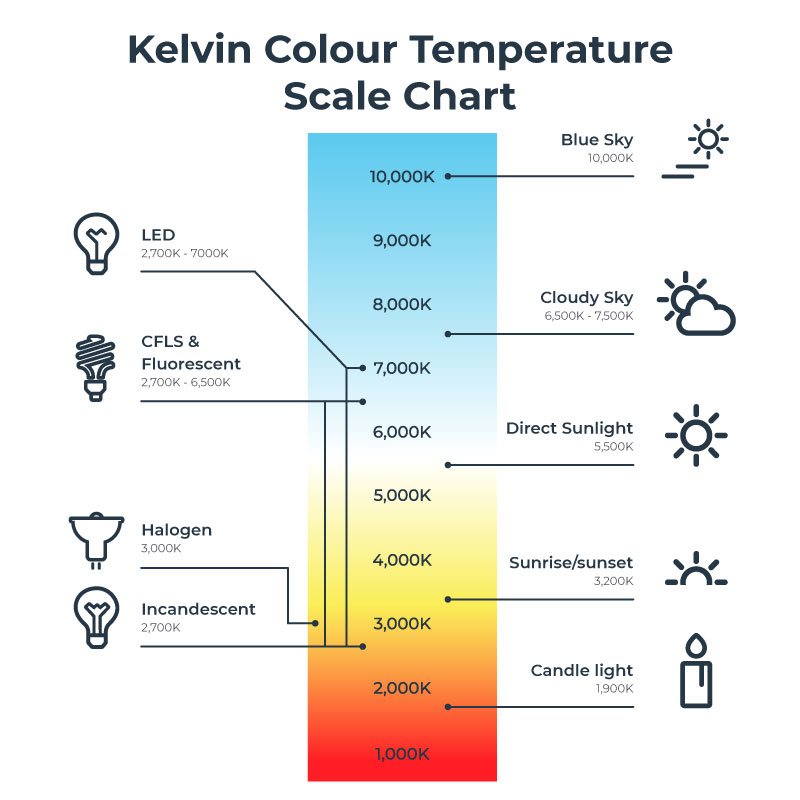
Refer to this chart for visual context on Kelvin ranges. Lower numbers mean warmer tones. Higher numbers indicate cooler, bluer light.
Standard flash sits firmly in the cool zone. If your makeup was chosen under warm LEDs, the mismatch causes shock. You aren’t seeing new colors.
You’re seeing true colors revealed by harsher scrutiny.
Identifying the Visual Artifacts: What You’re Actually Seeing
Once we understand the light source, we must identify specific visual errors. These artifacts ruin otherwise perfect applications. Recognizing them helps you troubleshoot quickly.
The White Cast Phenomenon in Physical Sunscreens
Physical blockers like titanium dioxide and zinc oxide scatter visible light. In low-light settings, this scattering is minimal. Under flash, however, the particles reflect UV radiation intensely.
This creates a ghostly white residue on the skin.
Aggregate reviews report this issue most frequently with SPF 30+ formulations. The higher the concentration of minerals, the stronger the cast. It doesn’t wash off.
It stays embedded in the photo file. Chemical filters absorb UV rather than reflecting it. They rarely cause this specific artifact.
However, some newer hybrid formulas still exhibit mild casting under direct strobe.
Flattened Dimensionality and Lost Contours
Contouring relies on shadow simulation. Dark powders mimic the absence of light. Flash floods every crevice with illumination.
The simulated shadows fill in. Your sculpted jawline merges with your neck.
Highlighters suffer too. Instead of glowing subtly, they flare out. The boundary between highlighted and matte skin disappears.
The face becomes a uniform plane. This lack of dimension makes subjects look wider. Cameras already distort perspective slightly.
Flash exaggerates this width by erasing vertical depth cues.
Shimmer Exaggeration and Texture Amplification
Glitter and pearl pigments behave unpredictably under point-source lighting. Each particle acts as a tiny mirror. Flash catches hundreds of these mirrors simultaneously.
The result is sparkle noise. It looks dirty or granular rather than luminous.
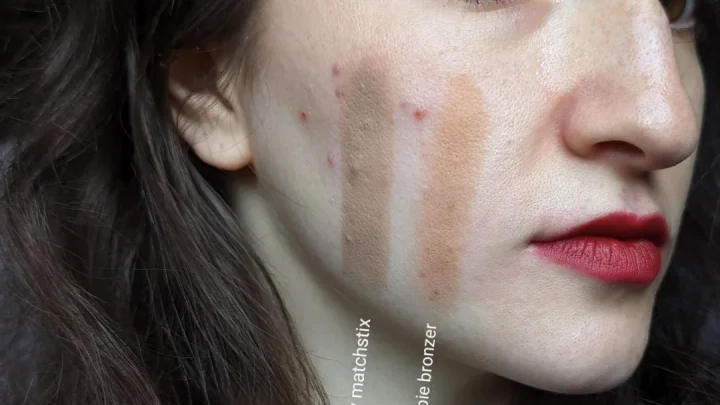
Furthermore, flash reveals microscopic texture. Fine lines, pores, and dry flakes reflect light sharply. Soft-focus lenses hide these details.
Bare flash exposes them brutally. Your "flawless" base suddenly shows every pore. This isn’t poor blending.
It’s optical truth amplified by intensity.
The Camera Sensor’s Role in Distorting Reality
Human vision adapts dynamically. Our pupils dilate and constrict instantly. We see both bright windows and dark corners clearly.
Cameras don’t work that way. Their sensors have fixed dynamic range limits.
Dynamic Range Compression and Highlight Clipping
When flash hits reflective makeup, the signal exceeds the sensor’s capacity. The data clips. Information is lost forever.
Pure white replaces detail. No amount of editing recovers texture from clipped highlights.
Mid-tone compression also occurs. To save the blown-out highlights, algorithms darken the rest of the image. Skin tones muddy.
Colors desaturate. The vibrant red lipstick turns dull brick. The rich brown eyeshadow fades to taupe.
The sensor prioritizes exposure safety over color fidelity.
Auto-White Balance Failures with Mixed Lighting
Most modern phones mix ambient LED with instant flash. The auto-white balance (AWB) algorithm gets confused. It tries to average two vastly different color temperatures.
The result is often greenish or magenta casts.
If your venue has pink neon signs, AWB might overcompensate. It adds green tints to neutralize the pink. Your beige foundation shifts toward olive.
This computational error compounds the physical lighting issues. Manual white balance fixes exist but require technical knowledge. Most casual users rely on faulty automation.
Diagnostic Workflow: Testing Your Makeup Before the Event
Don’t guess. Test. Create a controlled environment that mimics event conditions.
This saves embarrassment later. Follow this three-step protocol.
Step 1: The Direct Flash Self-Test Protocol
Take a selfie using the rear camera with flash enabled. Hold the phone at arm’s length. Ensure no external lights interfere.
Check the image immediately. Look for white cast on forehead and cheeks. Inspect shimmer placement.
Does it look granular? Note any unexpected color shifts in lips or eyes.
Step 2: Analyzing Pigment Behavior Under High Contrast
Zoom in on problem areas. Identify where shadows vanished. Mark spots where texture appeared.
Compare this to your mirror view. List discrepancies. Did your bronzer disappear?
Did your concealer turn gray? Write these observations down. They guide product selection adjustments.
Step 3: Adjusting Application Techniques for Photogenic Results
Reduce powder density in highlight zones. Use less shimmer overall. Switch to satin finishes instead of dewy.
Blend edges meticulously to avoid harsh lines against flattened shadows. Consider mattifying primers for oily zones. These tweaks minimize specular reflection risks.
Retest after adjustments. Iterate until the flash image matches your intent.
Formulation Choices That Survive the Flash
Not all products react equally. Ingredient composition determines performance under stress. Choose wisely based on optical properties.
| Feature | Mineral-Based SPF | Chemical SPF | Silicone Primers | Water-Based Foundations |
|---|---|---|---|---|
| Flash Reaction | High risk of white cast | Low risk of cast | Smooths texture, reduces glare | Can separate if layered poorly |
| Texture Visibility | Emphasizes dryness | Blends seamlessly | Fills pores effectively | Shows patchiness easily |
| Best For | Non-flash environments | All-day wear events | Photo-heavy occasions | Natural daylight shoots |
Mineral vs. Chemical Filters: Risk Assessment
Mineral filters sit on top of the skin. They reflect light broadly. This protection comes at a cost during photography.
Chemical filters penetrate slightly. They absorb energy without bouncing it back. For flash-heavy events, chemical options offer safer aesthetics.
Verify FDA labeling for active ingredient lists. FDA Cosmetics Database provides transparency on permitted substances.
Matte, Satin, and Dewy Finishes: How They React to Point Sources
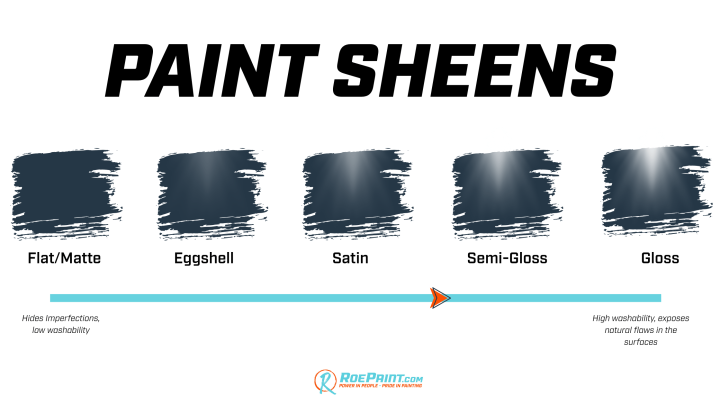
Matte finishes diffuse light best. They eliminate specular spikes. Satin offers a middle ground.
It retains slight radiance without excessive shine. Dewy looks catastrophic under flash. The wet appearance reads as grease.
Stick to satin or matte bases. Add strategic glow only via cream products underneath powder. Never layer loose glitter over dewy bases for photographed events.
Common Mistakes That Ruin Flash Photography Looks
You might think more powder solves shine. It doesn’t. Over-powdering creates a thick, opaque layer that reflects light diffusely but heavily.
This leads to the "ghost face" effect mentioned earlier. The skin loses its natural translucency. You look flat and lifeless in photos.
Instead of blanket application, focus on targeted mattifying. Use a small brush for the T-zone only. Leave cheeks and temples with their natural texture.
This preserves some dimensionality even under harsh flash. Less is always more when dealing with point-source lighting.
Another frequent error involves ignoring transition zones. Your face ends at the jawline, but your neck continues. Flash highlights any demarcation line between foundation and bare skin.
Aggregate reviews indicate this is a top complaint in wedding photography. Always blend product down past the earlobe and onto the upper chest.
Finally, relying solely on ring lights for prep is risky. Ring lights provide continuous, frontal illumination. They mimic video setups, not photographic flashes.
The shadow patterns differ significantly. A look that works under a ring light may fail spectacularly under a pop-up flash. Trust the diagnostic workflow described previously over vanity mirror checks.
Frequently Asked Questions About Flash and Makeup
Why does my sunscreen make me look white in photos?
Physical sunscreens containing titanium dioxide or zinc oxide reflect UV light. Camera flashes emit high levels of UV radiation. This interaction causes immediate white cast artifacts.
Chemical filters absorb UV instead of reflecting it. They rarely produce this effect. Switch to chemical formulas for photo-heavy events if possible.
Can I fix flash makeup issues in editing software?
Partial correction is possible, but limited. Clipped highlights cannot be recovered once data is lost. You can adjust exposure and contrast globally.
However, localized texture restoration requires advanced retouching skills. Prevention during application remains far easier than post-production rescue. Focus on formulation choices before shooting begins.
Does HD makeup actually work better under flash?
Yes, specifically formulated HD products use micronized pigments. These smaller particles scatter light more evenly than traditional bases. They reduce the visibility of pores and fine lines.
Manufacturer specs confirm improved compatibility with high-resolution sensors. Look for terms like "photo-friendly" or "HD-ready" on packaging labels.
Why do my eyes look red in flash photos despite makeup?
Red-eye occurs when flash illuminates blood vessels behind the retina. Dark eyeshadow absorbs light rather than reflecting it back. This reduces the bounce into the pupil area.
Applying darker shades near the lash line helps mitigate this optical phenomenon. Avoid shimmer shadows directly on the waterline for best results.

Similar Posts