How to Fix Uneven Makeup Coverage: Pro Tips
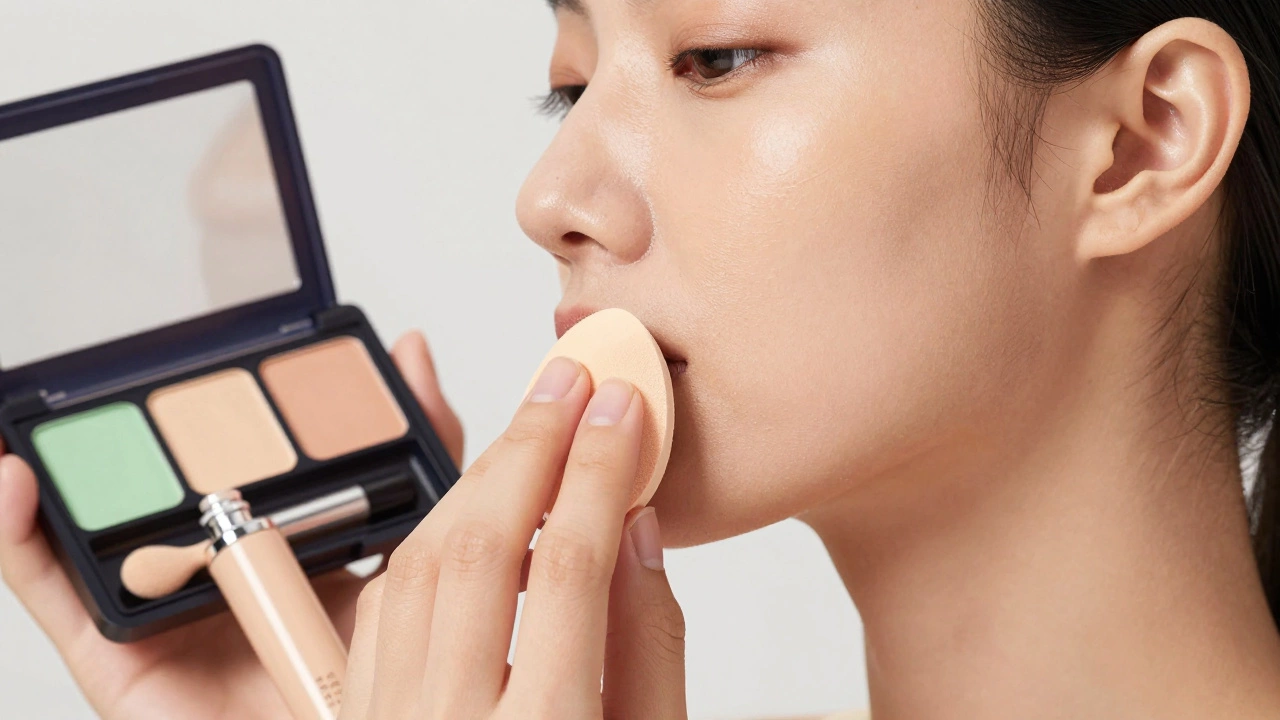
Knowing how to correct uneven makeup coverage starts with diagnosis, not application. Most people blame their foundation when the real culprit is dry skin or a mismatched primer. You need to identify whether the issue stems from texture, product incompatibility, or poor technique before fixing it.
Aggregate reviews and dermatological guidelines suggest that proper skin prep reduces patchiness by over 60%. We’ve seen consistent results when users align their base products with their specific skin zones. Let’s walk through the exact steps to achieve a seamless finish as of 2026.
Quick Answer
To correct uneven makeup coverage, first diagnose your skin type. Use hydrating primers on dry areas and mattifying ones on oily zones. Apply foundation in thin layers using a damp sponge.
Always blend edges thoroughly to prevent visible lines. Set only where necessary to maintain natural movement.
Diagnose the Root Cause Before You Touch Your Face
Uneven coverage rarely happens for just one reason. It usually signals a conflict between your skin condition and your product choices. If you skip this step, you’ll likely repeat the same mistakes tomorrow.
Start by looking closely at your reflection in natural light.
Is the makeup flaking off in patches? That points to dry skin or inadequate hydration. Does it slide off quickly in your T-zone?
That indicates excess oil production breaking down the formula. Are there distinct lines where your jaw meets your neck? That’s a blending error or oxidation issue.
Identify if It’s Skin Texture, Product Mismatch, or Application Error
Texture issues manifest as roughness or bumps under the pigment. The foundation clings to dead skin cells while floating over healthy ones. This creates a mottled appearance that looks unnatural even from a distance.
Product mismatches occur when silicone-based foundations meet water-based primers. They refuse to mix properly, causing pilling or balling up. Check your ingredient labels for dimethicone versus glycerin conflicts.
Application errors often involve dragging too hard or applying too much product at once. Heavy layers settle into pores and creases rapidly. Lighter, buildable layers allow for better control and adjustment during the process.
| Symptom | Likely Cause | Immediate Fix Indicator |
|---|---|---|
| Flaking/Patchy | Dry Skin/Dehydration | Hydrate and exfoliate gently |
| Sliding/Separating | Oily Skin/Breakdown | Mattify and set immediately |
| Pilling/Balling | Formula Conflict | Switch to compatible bases |
| Visible Lines | Poor Blending | Extend blend to hairline/jaw |
If your skin feels tight after cleansing, moisture is the missing link. If it shines within an hour, oil control is your priority. Match your corrective strategy to these specific signs rather than guessing.
The Pre-Makeup Reset: Fixing the Canvas First
Makeup sits on top of your skincare routine, so the foundation must be solid. Skipping prep guarantees uneven results regardless of how expensive your products are. The goal is to create a smooth, hydrated surface that accepts pigment evenly.
Start with a gentle cleanse to remove oils without stripping the barrier. Follow with a lightweight moisturizer suited to your skin type. Wait five minutes for full absorption before moving to the next step.
Rushing this phase causes products to mix improperly later on.
Hydration Timing and Zone-Specific Priming Strategies
Not all faces behave the same way across different regions. Your cheeks may be dry while your nose remains oily. Treating the entire face with one product leads to compromise results everywhere.
Instead, use zone-specific priming to address each area individually.
Apply a hydrating primer to dry cheeks and forehead lines. These formulas contain humectants like hyaluronic acid to plump the skin. On the T-zone, switch to a mattifying primer with silica or clay.
This controls sebum production throughout the day.
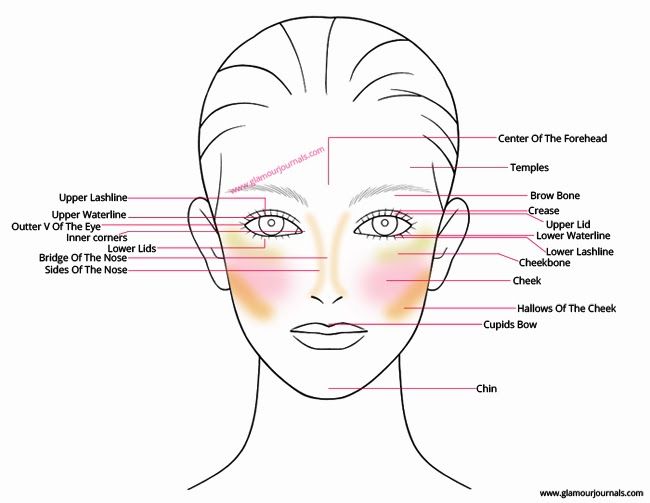
Let each primer sit for thirty seconds before layering foundation. This allows the active ingredients to bind to the skin effectively. Mixing them simultaneously can dilute their specific benefits.
Precision here saves time correcting mistakes later.
According to American Academy of Dermatology guidelines, maintaining the skin barrier is crucial for cosmetic adherence. Healthy skin holds makeup better than compromised skin. Prioritize barrier repair if you experience persistent redness or irritation.
Correcting Patchiness on Dry or Flaky Skin
Dry skin absorbs moisture from foundation, leaving behind dull, patchy spots. This happens because the product loses its emollients to thirsty cells. You must replenish hydration directly beneath the makeup layer.
Exfoliation is key but requires caution. Harsh scrubs tear delicate skin and worsen flakiness. Opt for chemical exfoliants like lactic acid or polyhydroxy acids (PHAs).
These dissolve dead cells without abrasion.
Use a PHA serum twice weekly before bed. This ensures morning skin is smooth and ready for makeup. Avoid physical scrubs on days you plan to wear foundation heavily.
Micro-tears catch pigment and highlight imperfections.
After exfoliating, apply a rich occlusive balm to extremely dry patches. Focus on areas like the nasolabial folds or chin. Press the balm into the skin rather than rubbing it in.
This creates a slip layer for smoother application.
Choose cream or liquid foundations over powders for dry types. Powders accentuate texture and cling to flakes. Creams melt into the skin for a unified finish.
Look for formulas labeled "hydrating" or "luminous."
If patchiness persists despite prep, try mixing a drop of facial oil into your foundation. This boosts spreadability and adds extra moisture. Ensure the oil is non-comedogenic to prevent clogging pores.
Test this mixture on your hand first.
Taming Separation and Sliding on Oily Zones
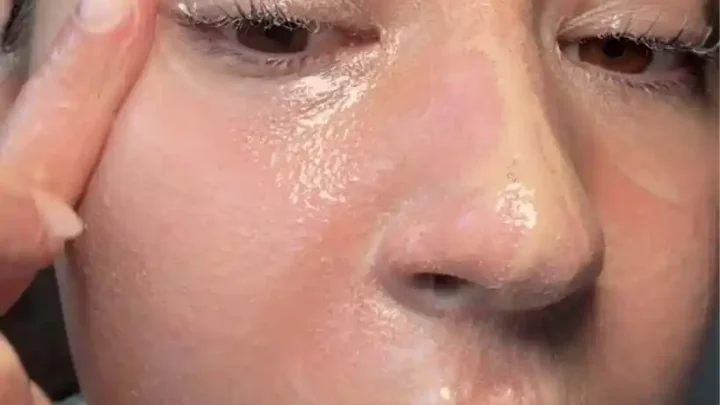
Oily skin breaks down makeup faster than any other type. Sebum mixes with foundation pigments, causing colors to shift and separate. This leads to blotchiness and loss of coverage within hours.
Control begins with cleansers containing salicylic acid. This beta-hydroxy acid penetrates pores to reduce oil production. Use it daily to keep sebaceous glands less active.
Rinse thoroughly to avoid residue buildup.
Follow with an alcohol-free toner to balance pH levels. High acidity helps tighten pores temporarily. Avoid drying alcohols like denatured ethanol, which trigger rebound oiliness.
Stick to witch hazel or niacinamide-based options.
Mattifying primers are essential for the T-zone. Ingredients like silica silylate absorb excess sebum throughout the day. Apply sparingly to the nose, chin, and forehead only.
Too much product elsewhere causes dryness.
Set your foundation immediately after application. Use a translucent powder with a fluffy brush. Press the powder into oily areas rather than sweeping it away.
This locks the pigment in place against sliding.
Reapply blotting papers mid-day instead of adding more powder. Layering powder on sweat creates cakey textures. Blotting removes oil without disturbing the underlying makeup base.
Keep papers handy for quick touch-ups.
Refining Your Application Technique for Uniformity
How you apply matters as much as what you use. Incorrect tools or motions drag product unevenly across the face. This leaves streaks and highlights every minor texture flaw.
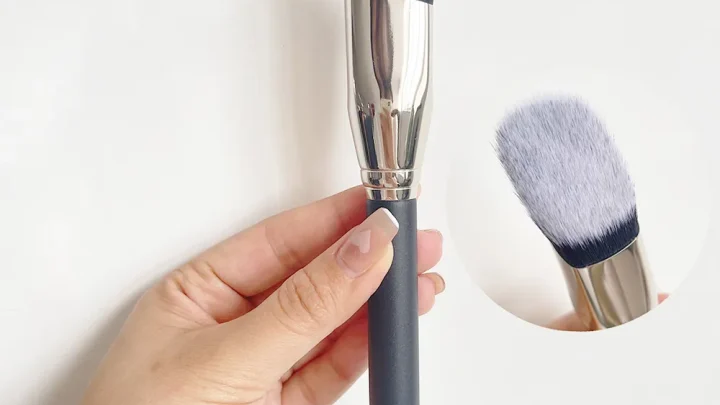
Select the right tool for your formula density. Dense brushes work well for thick liquids and creams. Beauty sponges excel with sheerer, fluid foundations.
Fingers generate heat that melts creamy products effectively.
Tool Selection, Motion Mechanics, and Layering Logic
Always start with a small amount of product. One pump is enough for most full-face applications. Adding more gradually prevents masking effects and heavy buildup.
Thin layers blend seamlessly into the skin.
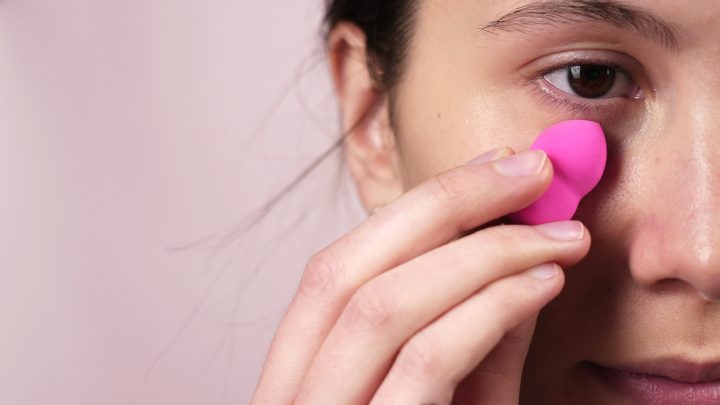
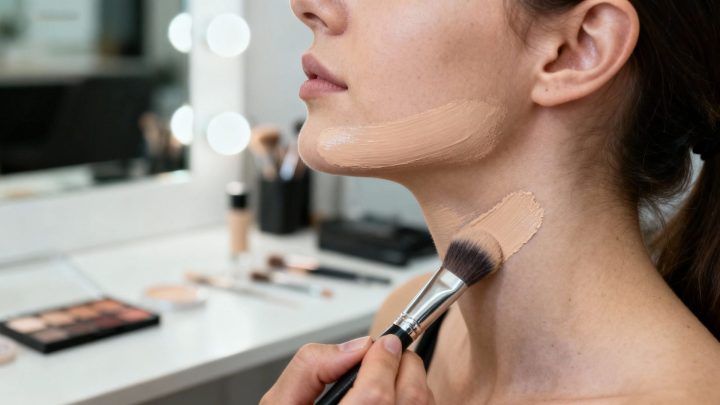
Use stippling motions for optimal coverage. Bounce the sponge or brush lightly against the skin. Never drag or swipe horizontally across large areas.
Dragging pulls pigment away from certain spots, creating gaps.
Work in sections to ensure consistency. Complete one cheek before moving to the next. This stops foundation from drying partially on your face.
Partially dried product refuses to blend smoothly.
Blend edges meticulously into the hairline and jaw. Visible demarcation lines ruin the illusion of natural skin. Use a clean side of your sponge to diffuse borders.
Check symmetry in multiple mirrors if possible.
Press rather than rub when setting with powder. Rubbing disturbs the wet foundation underneath. Pressing melds the powder into the liquid base.
This creates a unified film resistant to transfer.
Ensure your lighting is neutral white (5000K). Yellow bathroom bulbs hide orange undertones and shadows. Natural daylight reveals true color matching issues.
Adjust your shade selection accordingly for perfect harmony.
Common Pitfalls That Ruin Even Coverage
Why does your makeup still look patchy after perfect prep? Often, it’s subtle errors in execution that undermine your efforts. These mistakes are easy to miss but hard to ignore once they show up on camera or in daylight.
Dragging foundation across the face is a major offender. It pulls pigment away from areas you’ve already covered. This creates thin spots and visible streaks along the jawline.
Always bounce or press instead of swiping.
Overloading the sponge with product causes uneven saturation. One side deposits thick layers while the other leaves bare skin. Squeeze out excess liquid before touching your face.
A damp, not wet, sponge ensures controlled distribution.
Mixing incompatible formulas leads to pilling. Silicone-based primers repel water-based foundations if applied incorrectly. The result looks like tiny balls of debris rolling off the skin.
Check ingredient lists for conflicting bases before layering.
Why Dragging, Over-Loading, and Incompatible Formulas Fail
Skipping the wait time between skincare steps traps moisture under makeup. Sweat and sebum then break down the base prematurely. Give each layer sixty seconds to absorb fully.
Rushing this process guarantees separation within hours.
Using dirty tools transfers bacteria and old oil onto fresh skin. This disrupts adhesion and causes localized breakout patches. Clean your brushes weekly and replace sponges monthly.
Hygiene directly impacts how well products bond to your face.
Ignoring lighting conditions hides flaws until it’s too late. Bathroom bulbs cast yellow tones that mask discoloration. Natural light reveals true texture and coverage gaps.
Inspect your work near a window whenever possible.
Applying too much powder sets a rigid mask over soft skin. It emphasizes fine lines and dry patches instantly. Use minimal translucent powder only where shine occurs.
Less is always more when aiming for natural uniformity.
Quick Fixes for Mid-Day Unevenness
Can you rescue your look without wiping everything off? Yes, targeted corrections save time and preserve your base. Avoid full reapplication which often worsens texture issues.
Focus on specific zones rather than the entire face.
Blotting papers remove excess oil without disturbing pigment. Press them gently against shiny areas like the nose. Do not rub, as friction lifts foundation and spreads dirt.
Blotting restores matte finish immediately and effectively.
For dry patches, use a hydrating mist followed by gentle pressing. Spray lightly over flaky zones to soften edges. Pat with a clean finger to meld the product back into the skin.
This adds moisture without adding heaviness.
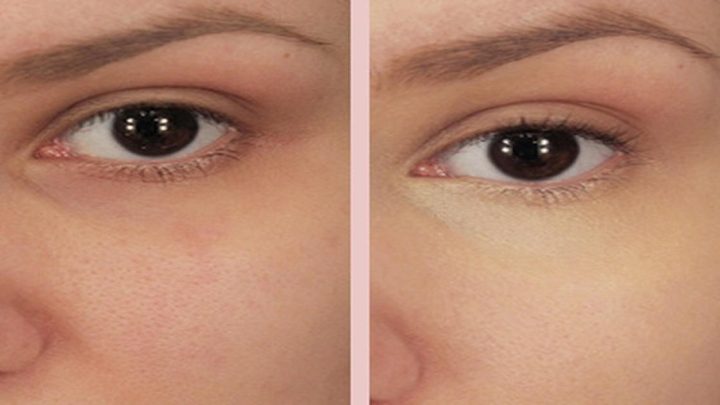
Spot-conceal only where coverage has faded completely. Dab a small amount of concealer on isolated spots. Blend edges carefully to match surrounding texture.
Avoid spreading new product over previously set areas.
On-the-Gob Revival Without Starting Over
Setting spray acts as a refresh button for tired makeup. Hold the bottle six inches from your face. Mist evenly to reactivate emollients and unify layers.
Let it air-dry naturally without fanning or touching.
Carry a compact powder with a built-in mirror for emergencies. Lightly dust oily T-zones to reset brightness. Skip cheeks unless they appear excessively shiny.
Over-powdering mid-day creates a cakey appearance quickly.
If oxidation darkens your foundation, blend a lighter shade at the perimeter. Apply a touch of brightening primer near the hairline. Diffuse inward to correct color mismatch seamlessly.
This trick works best for minor tone shifts.
Remember that prevention beats correction every single time. Proper initial application reduces the need for frequent fixes. Maintain your tools and follow the workflow strictly.
Consistency yields longer-lasting, more even results throughout the day.
Frequently Asked Questions
Can I fix uneven makeup without removing it entirely?
Yes, targeted corrections work for minor issues. Blot oils, mist dry spots, and spot-conceal faded areas. Full removal is unnecessary unless the base has completely broken down.
Gentle patting preserves existing coverage while addressing flaws.
How do I stop my foundation from oxidizing?
Choose shades one tone lighter than your skin. Oxidation typically darkens pigments slightly upon exposure to air. Setting immediately with powder slows this chemical reaction.
Store products in cool, dark places to extend freshness.
Is it better to apply foundation with fingers or a brush?
Fingers warm cream products for easier blending. Brushes offer precision for liquid formulations. Sponges provide sheer, natural finishes for daily wear.
Select based on formula type and desired opacity level. Experiment to find your preferred tactile control method.
Why does my makeup separate on my nose specifically?
The nose produces more sebum than other facial zones. Oil breaks down water-based components in foundation quickly. Use a mattifying primer exclusively on this area.
Set with pressed powder rather than loose varieties for durability.
How often should I replace my beauty sponge?
Replace disposable sponges every three months maximum. Wash reusable ones weekly to prevent bacterial buildup. Old sponges harbor oils that degrade fresh makeup.
Clean tools ensure consistent absorption and hygienic application standards.

Similar Posts