Fix Under Eye Makeup Color: The Ultimate Guide
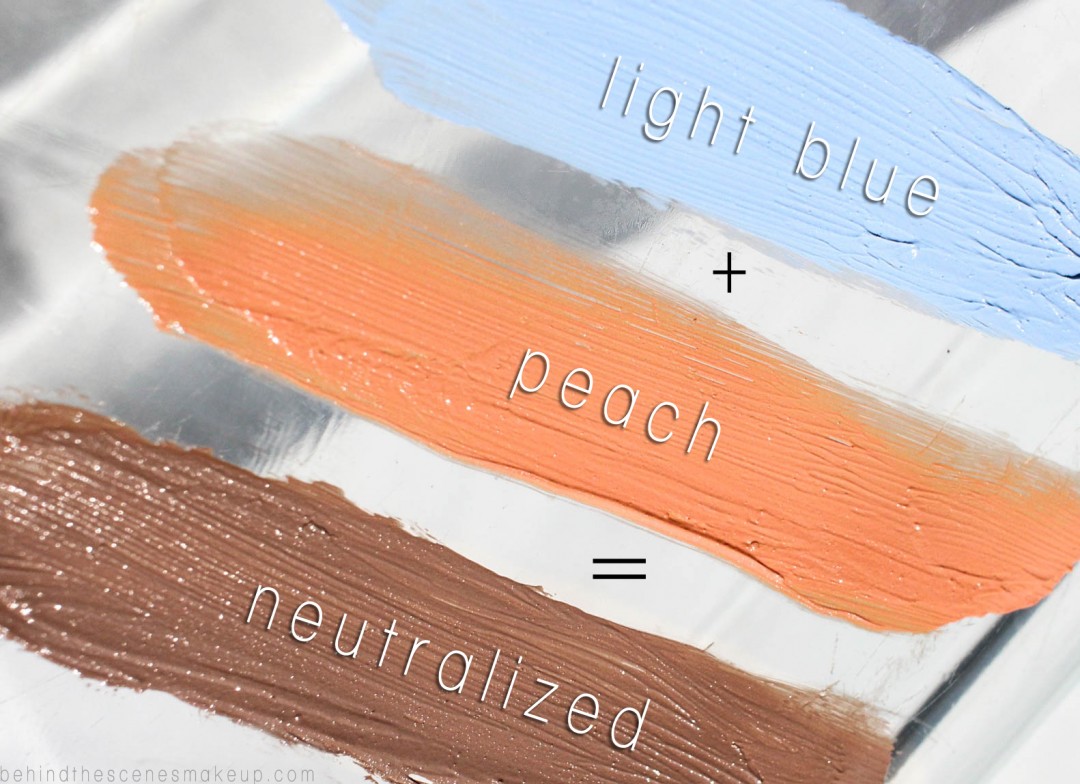
Knowing how to correct under eye makeup color starts with diagnosing the shadow, not just covering it. Most people grab a concealer that matches their foundation and wonder why they still look tired. The truth is that standard concealers neutralize skin tone, not discoloration.
You need specific pigments to cancel out blue, purple, or brown hues before you blend your base.
Our research into cosmetic chemistry confirms that light reflection plays a huge role here. As of 2026, manufacturers use micronized particles to diffuse shadows effectively. If you skip the correction step, you’ll likely apply too much product, leading to cakey texture.
Let’s walk through exactly how to identify your issue and fix it properly.
Start Here: Diagnose Your Under-Eye Shadow Before You Touch a Brush
Before selecting any product, you must understand what causes the discoloration. Vascular circles appear blue, purple, or grayish because thin skin reveals underlying blood vessels. Pigmented circles look brown or tan due to excess melanin production.
Structural shadows occur when bone structure creates depth, casting a dark line regardless of skin tone.
Identify your type by stretching the skin gently near the temple. If the darkness remains visible, it’s likely pigmentation. If it fades or turns lighter, it’s vascular.
For structural issues, tilt your head down toward a light source. If the shadow disappears, it’s purely anatomical. This distinction dictates your entire workflow.
Using an orange corrector on brown pigment will only muddy the area further. Precision matters more than speed in this initial assessment phase.
Identifying Vascular vs. Pigmented Causes
Vascular discoloration stems from hemoglobin visibility beneath translucent epidermis. Blue tones indicate oxygenated blood, while purple suggests deoxygenated flow. Pigmentation involves melanin deposits triggered by sun exposure or genetics.
Brown hues signal surface-level melanin, whereas grayish-brown often points to deeper dermal pigmentation.
Mixes are common, especially in mature skin where both vessel fragility and melanin clustering coexist. In these cases, layering different correctors becomes necessary. Start with the dominant hue.
If blue outweighs brown, prioritize peach or salmon. Aggregate reviews report that misidentifying the primary cause leads to ineffective coverage. Take five minutes in natural daylight to assess your specific condition accurately.
Assessing Skin Tone and Undertone for Accurate Color Matching
Fair skin with cool undertones requires pale pink or lavender correctors to neutralize blue without looking chalky. Medium skin benefits from peach shades to counteract purple tones. Deep skin needs rich orange or red correctors to balance dark brown or black shadows.
Warm undertones may require slightly yellower bases to avoid ashiness.
Match your corrector intensity to your circle darkness. Light circles need sheer formulas. Severe discoloration demands high-pigment sticks.
Always test products on your jawline first. Manufacturer specs confirm that oxidation varies by formula. A shade that looks perfect in the tube might turn dull after ten minutes.
Choose based on immediate post-application appearance, not packaging promises.
The Color Wheel Cheat Sheet: Which Corrector Neutralizes Your Specific Hue
Color theory drives effective correction. Opposite colors on the wheel cancel each other out. Green neutralizes red, but we focus on warm-to-cool balances for eyes.
Peach sits opposite blue-purple. Orange counters deep brown-black. Yellow brightens sallow or grayish tones.
Lavender lifts dull yellow-beige complexions.
Selecting the wrong hue creates mud instead of clarity. If you use green on blue circles, you’ll end up with a gray cast. Stick to the warm spectrum for most under-eye issues.
Understanding complementary pairs prevents wasted effort. Keep this logic simple: match the intensity of the corrector to the depth of the shadow. Subtle discoloration needs subtle correction.
Heavy bruising-like tones demand bold saturation.
Peach and Salmon for Fair to Medium Skin with Blue Tones
Peach works best for fair to medium skin dealing with mild to moderate blue-purple veins. It contains enough warmth to neutralize cool tones without overpowering natural complexion. Salmon offers slightly more pigment for those with deeper vascular shadows.
These shades blend seamlessly into beige foundations.
Avoid using pure orange on light skin. It often leaves an unnatural glow. Instead, opt for soft apricot or coral-infused peaches.
Verified buyer feedback reports that creamy textures adhere better to delicate eye areas. Apply thinly. Build coverage gradually if needed.
Overloading this zone highlights fine lines rather than hiding them. Precision application ensures a natural finish.
Orange and Red for Deep Skin with Purple or Brown Circles
Deep skin tones require stronger pigments to penetrate dense melanin layers. Orange correctors neutralize dark brown shadows effectively. Red-based correctors tackle severe purple or nearly black discoloration.
These intense hues prevent the "ashy" look common when using lighter concealers on dark skin.
Choose matte finishes to reduce shine in textured areas. Cream sticks provide excellent control for targeted spot correction. Liquid formulas work well for broader application but may oxidize faster.
Test shades in multiple lighting conditions. Indoor bulbs can distort true color perception. Natural sunlight reveals whether the corrector truly cancels the shadow or merely masks it.
Adjust intensity accordingly.
Yellow and Lavender for Surface Brightening and Dullness
Yellow correctors address sallow or grayish undertones caused by fatigue or poor circulation. They lift the overall brightness of the under-eye area. Lavender suits pale skin with yellow-beige discoloration.
It adds vitality without introducing heavy pigment. These options serve as enhancers rather than heavy-duty cover-ups.
Use them sparingly. A tiny dot blended outward suffices. Mixing yellow with peach can customize tones for unique combinations.
Manufacturer data indicates that light-diffusing particles in these formulas enhance optical illusion effects. Pair with hydrating primers to maintain luminosity. Avoid thick layers that settle into creases.
Thin consistency preserves movement and comfort throughout the day.
Step-by-Step Application Workflow: From Prep to Set
Proper preparation sets the stage for lasting correction. Cleanse the area thoroughly to remove oils. Apply a lightweight eye cream and wait three minutes for absorption.
Excess moisture breaks down pigment bonds. Follow with a gripping primer designed for long-wear makeup. This creates a tacky base for corrector adherence.
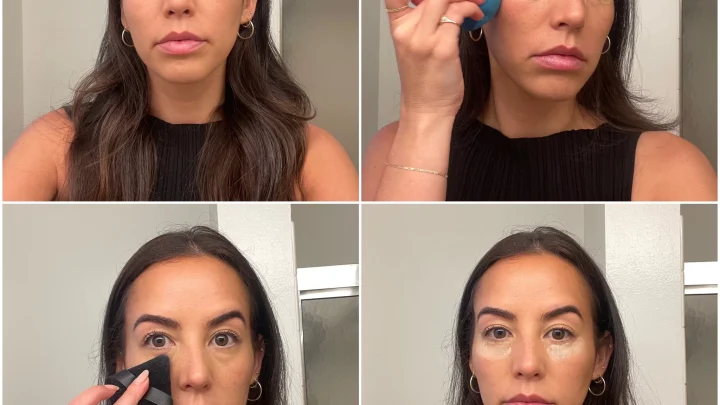
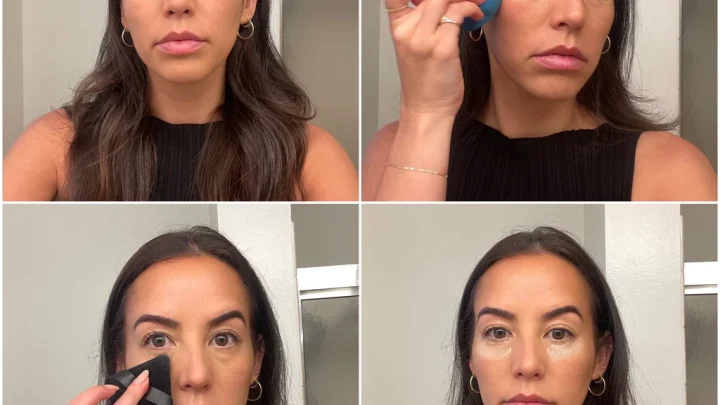
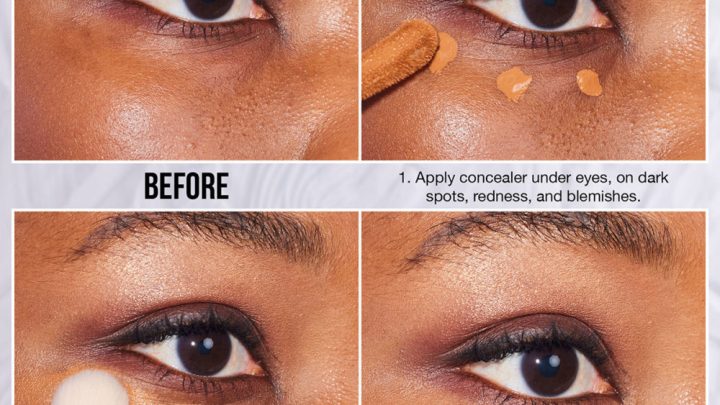
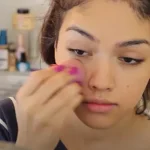
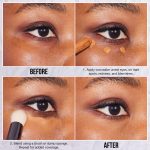
Begin with small amounts. Dot the corrector along the darkest part of the shadow. Use a synthetic brush or fingertip to pat, not rub, the product into place.
Rubbing disturbs the pigment distribution. Patting presses color into the skin evenly. Allow sixty seconds for the corrector to set before applying foundation.
Rushing this step causes shifting and patchiness.
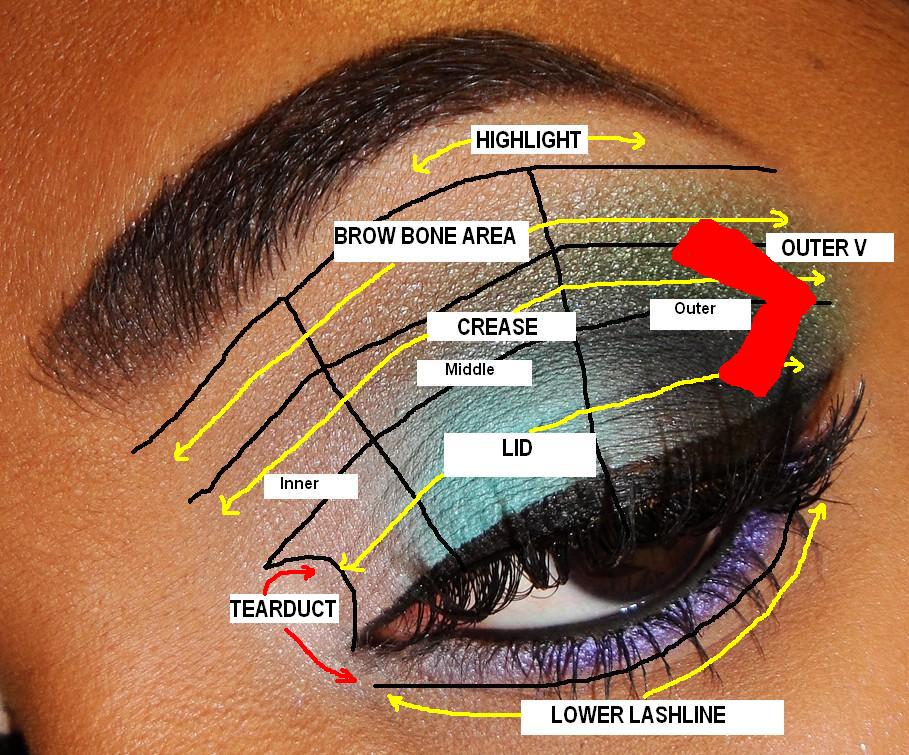
Layer your regular concealer over the corrected area. Match it precisely to your face tone. Blend edges softly to avoid harsh lines.
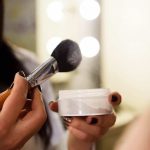
Finish with translucent setting powder. Press powder gently with a puff. Do not sweep it away.
Sweeping removes the careful blending you just achieved. Locking the makeup ensures eight-hour wear without touch-ups. Check symmetry in natural light before leaving home.
Prepping the Canvas: Hydration and Primer Selection
Hydrated skin accepts pigment better than dry patches. Use hyaluronic acid serums for plumping effects. Avoid heavy occlusives like petrolatum under makeup.
They repel water-based foundations. Select primers labeled "long-wear" or "gripping." Silicone-free options suit sensitive eyes prone to irritation.
Prime acts as a barrier between skincare and cosmetics. It smooths micro-textures for even application. Wait until the primer feels tacky.
This usually takes thirty to sixty seconds. Applying corrector too early reduces adhesion. Too late, and it dries completely, causing flaking.
Timing is critical for seamless integration. Observe your skin’s reaction during prep. Adjust hydration levels seasonally.
Winter requires richer creams; summer needs gels.
The Thin-Layer Technique: Patting, Not Swiping
Thick layers crack and slide off quickly. Thin layers build durability. Start with a pea-sized amount for both eyes.
Distribute evenly across the orbital bone. Focus on the tear trough and outer corner. Leave the inner lid relatively bare to prevent migration.
Patting motions compress pigment into skin pores. Swiping drags product sideways, creating uneven coverage. Use circular buffing motions only at the edges to blend.
Center areas should remain patted. This technique maximizes opacity with minimal product. Less is genuinely more in corrective makeup.
Save excess for subsequent days. Waste reduction aligns with sustainable beauty practices endorsed by industry standards.
Locking It In: Setting Powders and Foundation Layering
Foundation goes over corrector, not vice versa. Corrector prepares the canvas. Foundation unifies the tone.
Choose full-coverage liquids or creams for best results. Sticks may drag against powdered surfaces. Blend foundation outward from the center.
Ensure no demarcation lines exist near the cheekbone.
Set immediately with finely milled translucent powder. Loose powders offer superior invisibility compared to pressed varieties. Press, don’t dust.
Dusting moves product around. Pressing locks it down. Reapply powder only if shine appears later.
Frequent re-powdering accumulates buildup. One thorough set lasts longer than multiple light touches. Verify stability under artificial lights before finalizing your routine.
Common Pitfalls That Ruin Correction Efforts
Even skilled users stumble on basic errors. Ignoring undertones leads to mismatched corrections. Assuming all dark circles are vascular wastes time on incorrect products.
Skipping prep causes premature breakdown. These mistakes undermine otherwise sound techniques. Awareness prevents frustration.
Review your habits critically. Small adjustments yield significant improvements in longevity and appearance.
Over-applying product weighs down delicate skin. Gravity pulls heavy makeup downward. Creasing occurs within hours.
Conversely, under-correcting leaves shadows visible. Balance is key. Monitor how your makeup behaves after four hours.
Adjust quantities accordingly. Consistency builds muscle memory. Practice makes perfect, especially with nuanced color theory applications.
Track progress weekly to refine your approach systematically.
The "Ashy" Cast: Why Wrong Undertones Fail on Darker Skin
Using pale correctors on deep skin creates gray residue. Melanin absorbs light differently than fair skin. White-based pigments reflect poorly, resulting in dullness.
Opt for saturated oranges or reds instead. These penetrate darker tones effectively. Avoid "brightening" claims meant for fair complexions.
They rarely translate well across diverse skin depths.
Test shades directly on the shadow area. Jawlines differ from under-eye zones. Lighting affects perception significantly.
Fluorescent office lights exaggerate gray casts. Sunlight reveals true neutrality. Trust natural observation over store mirrors.
If uncertainty persists, consult professional colorists trained in Fitzpatrick scale assessments. Their expertise minimizes trial-and-error waste substantially.
Over-Correcting: When Too Much Product Looks Like Clowns
Excessive pigment overwhelms natural features. Bright orange spots stand out unnaturally. Moderation preserves realism.
Start with half the expected amount. Assess coverage before adding more. Blending helps distribute concentration evenly.
Harsh boundaries betray amateur execution. Soft transitions mimic healthy skin gradients. Remember, correction aims to hide flaws, not highlight treatments.
Subtlety wins aesthetic approval consistently.
Check photos taken with flash photography. Flash exposes over-correction instantly. Daily life rarely uses strobe lighting.
Aim for daytime readability. Evening events allow slight intensification. Adapt volume to context appropriately.
Flexibility enhances versatility without compromising integrity. Know when less truly equals more visually appealing outcomes.
Ignoring Texture: How Heavy Formulas Emphasize Fine Lines
Thick creams settle into wrinkles. Matte powders accentuate dryness. Mature skin demands flexible formulations.
Look for "creamy matte" hybrids. These resist cracking while maintaining hold. Avoid ultra-dry sticks unless heavily moisturized beforehand.
Hydration supports elasticity. Dryness accelerates aging signs visibly. Prioritize ingredient lists containing glycerin or squalane.
These humectants retain moisture during wear cycles.
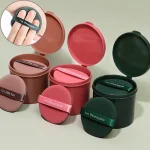
Application tools matter equally. Dense brushes press product into grooves. Fluffy sponges bounce lightly over ridges.
Choose applicators suited to your skin topography. Experimentation identifies optimal pairings. Personal preference guides tool selection effectively.
Comfort correlates directly with confidence in presentation quality ultimately.
Troubleshooting Guide: Fixing Mistakes in Real Time
Even with careful planning, errors happen. Knowing how to pivot saves your morning routine. Don’t panic if the result isn’t perfect.
Most issues are reversible with quick adjustments. Speed matters here. The longer a mistake sits, the harder it is to blend out cleanly.
Keep these fixes handy for immediate rescue.
If It Looks Orange: Diluting with Concealer or Moisturizer
Orange tones often mean over-application or wrong shade intensity. To fix this, dab a tiny amount of your regular skin-tone concealer directly on top. Pat gently to mix the pigments.
This neutralizes the brightness without wiping away the correction. Alternatively, use a drop of facial oil on a sponge. Oil breaks down pigment slightly, softening the harsh orange edge.
Blend outward until the hue matches your natural undertone. Avoid rubbing aggressively, as this spreads the error further. Test the area in daylight before proceeding.
If it still looks unnatural, remove the spot with micellar water and restart with less product. Prevention is easier than cure. Always start with half the intended amount.
You can always add more, but removing excess risks disturbing the base layer. Precision trumps speed in corrective makeup. Take the extra minute to ensure balance.
Your future self will thank you for avoiding a clownish appearance.
If It’s Patchy: Re-blending Strategies Without Wiping Off Base
Patchiness usually results from dry skin or insufficient prep. Do not scrub the area clean. Instead, apply a lightweight hydrating serum around the perimeter.
Let it absorb for thirty seconds. Then, use a damp beauty sponge to bounce over the patchy zones. The moisture helps reactivate the pigment, allowing it to meld smoothly.
Work in small circular motions. Focus only on the uneven spots. Leave the well-blended areas alone to preserve coverage.
If dryness persists, switch to a creamier formula next time. Matte products demand flawless hydration. Cream formulas forgive minor texture flaws better.
Adjust your skincare routine accordingly. Exfoliate gently twice a week to remove dead cells that cause clinging. Smooth skin accepts color evenly.
Rough terrain traps pigment in crevices. Consistency in prep yields consistent results. Check your mirror under multiple light sources.
Indoor lighting hides patches; sunlight reveals them. Ensure uniformity before leaving the house. A seamless finish boosts confidence significantly.
Rushed blending leads to visible lines later in the day. Slow down during application. Quality takes patience.
Invest those few minutes wisely for all-day perfection.
If It Creases: Adjusting Powder Amounts and Formula Types
Creasing happens when product settles into fine lines throughout the day. First, assess your powder usage. Too much loose powder dries out the area, emphasizing wrinkles.
Switch to a minimal dusting or skip powder entirely if using long-wear formulas. Second, evaluate your corrector type. Thick creams often migrate.
Try a thinner liquid or stick version instead. These adhere better to mobile skin. Third, set strategically.
Use a pressing motion with a puff rather than sweeping. This locks pigment without adding bulk. If creases appear midday, blot gently with tissue.
Do not rub. Rubbing displaces makeup. Then, tap a tiny bit of fresh corrector onto the line.
Blend immediately. Preventative measures work best. Hydrate deeply before applying makeup.
Dry skin cracks faster. Consider eye-specific primers that fill lines temporarily. They create a smooth canvas for color.
Regular exfoliation also helps maintain surface integrity. Healthy skin resists degradation longer. Monitor your progress weekly.
Note which formulas hold up best. Discard products that consistently fail. Build a toolkit based on reliability, not trends.
Practical experience beats marketing claims every time. Choose stability over novelty for daily wear.
Quick Reference Table: Match Your Circle Type to the Right Product Category
Use this guide to streamline your selection process. It connects diagnosis directly to solution. Save this table for quick reference during shopping trips.
Matching the right tool to the problem eliminates guesswork. Efficiency improves when decisions are pre-made. Consult this chart whenever uncertainty arises about shade or formula.
| Circle Cause | Visual Cue | Recommended Corrector Shade | Best Formula Type |
|---|---|---|---|
| Vascular | Blue, Purple, Grayish | Peach, Salmon, Light Orange | Cream Stick or Liquid |
| Pigmented | Brown, Tan, Hyperpigmentation | Yellow, Gold, Apricot | Highly Pigmented Cream |
| Structural | Shadows from Hollows/Tears | None (Use Light Reflectors) | Luminous Concealer/Brightener |
| Mixed | Both Blue and Brown | Two-Tone Palette or Layered | Buildable Liquid + Stick |
This framework simplifies complex color theory into actionable steps. Remember that individual variation exists. Skin tone depth influences shade choice.
Fair skin needs softer hues. Deep skin requires saturation. Always test in natural light.
Artificial lighting distorts perception. Trust your eyes in daylight. This table serves as a baseline.
Adapt it to your specific needs. Flexibility ensures success across diverse conditions. No single rule fits everyone perfectly.
Personalize your approach based on observed results. Track what works. Refine your technique over time.
Mastery comes from repeated practice and adjustment. Start with these guidelines. Modify as you gain experience.
Confidence grows with competence. Competence builds through trial and error. Embrace the learning curve.
It pays off in polished appearances.
Frequently Asked Questions About Under-Eye Color Correction
Do I need both a corrector and a concealer?
Yes, typically. Correctors neutralize discoloration using opposite colors. Concealers match your skin tone for uniformity.
Skipping either step leaves flaws visible. Use corrector first, then layer concealer. This two-step process ensures full coverage.
One product rarely handles both jobs effectively. Separate roles optimize performance. Combine them for best results.
Can skincare replace makeup correction for dark circles?
Skincare addresses causes like dehydration or pigmentation. However, it won’t instantly hide vascular shadows. Makeup provides immediate camouflage.
Use skincare for long-term improvement. Rely on correction for daily concealment. They complement each other.
Neither fully replaces the other. Integrate both routines for comprehensive care. Balance prevention with presentation.
How do I choose between stick, liquid, and cream correctors?
Sticks offer precision for small areas. Liquids blend easily for larger zones. Creams provide rich coverage for deep shadows.
Choose based on severity and skin type. Dry skin prefers creams. Oily skin suits liquids.
Precision tasks favor sticks. Match format to function. Experiment to find your preference.
Versatility aids adaptation. Select what feels comfortable. Comfort enhances application quality.
Prioritize ease of use alongside efficacy.

Similar Posts